Welcome to our website !

A ''Lollipop Malt'' is a sweet idea for a gift or centerpiece. This sweet lollipop candy bouquet is easy to make and is a unique and practical gift ...

You need:
  • 1 milkshake glass
  • 1 small Styrofoam ball or cut your own scrap Styrofoam to fit
  • shredded paper
  • Lollipops


Image

Plain or fancy, these straws decorated with baking-cup flowers make your drinks irresistible. So here are three ideas for adding a little pizazz to your cocktail straws ....


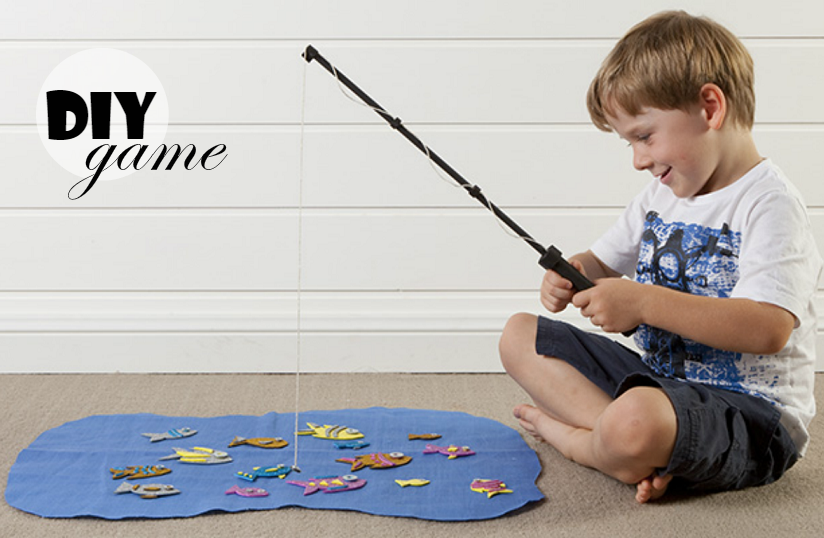
Make a fun fishing game for the kids with this easy craft idea. Get the kids involved, use Tara's free template and get creative decorating your fish or use the printable fish. Have fun fishing ....

You will need:
  • Colored and black foam sheets
  • Scissors
  • Craft glue
  • Printable fish template
  • Dowel rod
  • Black paint
  • Masking tape
  • String
  • Magnates
  • Washers - various sizes

Fishing Rod Base
Cut your rod to length with a hand saw and paint it with a black acrylic color.


Fishing Rod Handle
Before adding the handle to your rod, glue on your fishing string.
Cut a black piece of foam to size. Tara's measures 140mm high.
Glue and wrap the foam around the rod making sure it covers where the string has been attached.
Cut two small strips of foam and glue these around the bottom and top of the handle. This will create a real fishing rod feel to the grip.


Fishing Rod Loops
Cut small strips of foam and wrap them around the rod and string. One at half way, one 3/4 and one at the very top.
These will hold the string in place. Let the string hang loose between these loops.


Magnets
Slip a washer onto the end of the string. Glue the string to the magnet and glue the washer over the string. The washer will hold the string closer to the center of the magnet meaning the magnet will hang flat. This will make it easier to pick up the fish.


Make Your Fishes
Print off your template and the fish out of your colored foam sheets. You'll find scissors work really well on these sheets.
Decorate Your Fish. Add a washer to the eye of the fish, this is so you can catch them.

Make Your Pond
Tara cut a pond from a piece of fabric, but felt or cardboard would work as well.
Once everything is dry you can head off and go fishing.

Tara's Top Tips Some magnets are only magnetic on one side and repel on the other. Therefore make sure you attach it so the magnetic side is facing the right way to pick up the fish.

Source

Real leather table accessories can be super easy to make, but they'll have any place setting looking like a million bucks. In this easy step-by-step tutorial we are shown how to make leather napkin rings ....


Decorate a cake with candles made from sheets of beeswax and cookie cutters ....

Materials
  • Sheets of beeswax, in pink
  • Letter-shaped cookie cutters
  • Hair dryer
  • Toothpicks
  • Cotton candlewick
Steps
  1. For each candle, cut out 4 of the same letter from beeswax sheets, using cookie cutters. If the wax is hard to handle, soften it using hair dryer (on low).
  2. Make 2 stacks of 2 letters.
  3. Press a toothpick vertically into 1 stack.
  4. Vertically press in the end of the candlewick above the toothpick, so the toothpick and the wick meet. Trim wick to 1 inch above the top of the letter. Press second stack of letters down on top, sandwiching toothpick and wick between them; press to join the stacks of letters together.
Source

Angela Pyjas shows us in the following video ho to make a treat or favor bag for any occasion. This version if for a Birthday Treat. Look at the cute window to see all the sweet treats ....


These DIY Ice Cream Cone Balloons are perfect for Birthday Parties and Summer Fun. Use them as a table centerpiece, yard decorations or hang them at a party for a fun and creative addition to the celebration ....


This tassel tutorial uses a plastic tablecloth. You may also use tissue paper, but I find the plastic to be a bit more durable. See the video for all the instructions ....


Easy DIY Pinata. Create a homemade Mexican five cone birthday party star pinata, beautiful and professional looking candy filled pinata; made from paper mache. And all you will need is: balloon, newspaper, flour and water, craft glue, crepe paper/tissue paper, birthday party hats, paint brush, scissors, string and candy....


Are you wondering how to make your own adorable paper cones for your next party. This paper cones can be use at birthday parties, bridal showers, even weddings. With the following simple instruction you too will learn how to make chic paper party cones favors ....


Summer is a time of fun for most. What have you been doing this summer? Something or nothing? See which activity you should be doing based on these questions you answer ....

Image

These are so easy to make. I made the ivory stand for June's luncheon & the ''sea foam'' strand to add a little twinkle to June's room for Christmas.

Ideas for use: holiday decor, photo props, event decor (baby shower, bridal shower, wedding).

Materials:

  • 1 string of lights (I used 50 ct. white lights)
  • 2 yards of tulle (I used 2 yards, but it could take more depending on how ruffled & full you want them to be)
  • Lace (optional)

Method:

  1. Cut squares of fabric and tie them along the wiring of the lights (squares work better than strips for creating the ruffled look). My squares were approx 7-8'' and I tied one on each side of every bulb.
  2. For the lace version, I cut larger squares of tulle, but instead of tying the tulle to the wire, I tied the tulle to the wire with the lace.


Source

Stirring up a spooky batch of spiked Witch's Brew is always a crowed pleaser, but add another creative touch to your party punch with these adorable witch broom cocktail stirrers ....

Supplies:

  • Raffia
  • Candy apple sticks, or plain cocktail stirrers
  • Floral wire
  • Wire cutters
  • Hot glue
  • Scissors

Directions:


Step 1: Cut off a bunch of raffia, about 12 pieces, approximately a 8 inches long. If you're cutting from a bigger bunch of raffia, it's easier to use the pieces on the end that are folded over. These will naturally fold over your sticks.

Step 2: Fold the pieces of raffia over, and wrap in one big bunch. The folded over side will be what is glued to the stick.


Step 3: Wrap the raffia bunch with floral wire about 3 or 4 times, or until secure. Twist tie one end so that it stays secure. Ship with wire cutters.


Step 4: Cut off the excess raffia with scissors, short enough so that it still looks like a broom. I left mine about 2 inches or so. (As show in the photo, I temporarily placed it on the stick to get a perspective of length).


Step 5: Sure the raffia bunch to the stick with hot glue. Put a dab of hot glue on the end of the candy apple stick (the point end), and insert into the raffia bunch. Use more hot glue to secure the loose raffia to the stick, if desired.

Step 6: Wait a few minutes to dry. Now, your broomstick cocktail stirrers are ready to be used!


Source
Image


Tutorial DIY video on how to make paper pom poms for room decoration or a party ....


And don't forget! LIKE our Facebook Page to be notified of all the new DIYs''

I'm not usually a glitter fan, but once I saw this orange/pink color combo, I had to try it out. Hung in a doorway or for a party, they add a little sparkle ....

You need:

  • Paper lantern (a white 10'' & 12'' in this tutorial)
  • Spray glue for glitter
  • Glitter
  • Drop cloth or something where you can let the glitter drop


Method:

  1. Follow the directions on the package of the paper lantern to insert the light bulb and create the globe shape.
  2. With your glitter can, spray the lantern in patches then immediately add a handful of glitter. Let the extra glitter drip onto your drop cloth. You can use the extras as you go along or at the end.
  3. Repeat, repeat, repeat! The key to glitter is layers upon layers. You don't want it to look sparse so you might have to go over it again and again.

Tip: Do this in an area where you wouldn't mind glitter remaining. Glitter has a mind of its own and will stay on whatever is near. And don't think using a broom will help much. I learned this the hard way.


These lights were inspired by all the beautiful blooms I've been seeing around town. I wanted to bring the summer indoors, but they could make for some colorful outdoor lighting too.

Making these floral garlands couldn't be faster - all you need are cupcake papers (large and small), string lights, scissors, and an exacto knife ....


Step 1: To make leaves - fold small cupcake paper in half 2 times, and with the folded point at the bottom cut a leaf shape.

Step 2: To make an 8-petal flower - fold a small cupcake paper in half 3 times, and with the folded point at the bottom cut around the top.

Step 3: To make a 16-petal flower - fold a large cupcake paper in half 4 times, and with the folded point at the bottom cut around the top.


Step 4: Cut a small X in the center of each paper.


Step 5: Layer cupcake papers onto each lightbulb to make flowers.


Liven up your next party with a homemade photo booth. Rachel Kashon of lupaandpepi.com will show you how it's done. All you need is a blank white wall and a little creativity ...


Make great party decorations using left over Tissue Paper. This is going to be fun to make and you can use all sorts of colors... so cute.


Image

This gorgeously detailed wedding invitation is perfect for your vintage wedding. The scroll work resembles wrought iron, and I've designed it in black to enhance this feel. To really create a memorable set pair it with a DIY wrought iron lace envelope. It's a simple project, and you can fiew the steps in the video below.

  • Colors: Black
  • Trim Size: 5 x 5' square
  • Envelope Size: 5.75' square
  • Prints On 8.5 x 11 (Letter) A4
  • Fonts: Engravers MT, Old Script

Grab your leftover tissue paper to make the cutest number sign to set out on the table.

Materials:
  • tissue paper
  • artist canvas
  • fabric
  • staple gun
  • hot glue gun
Now, watch the video below and follow along to make this cute birthday sign ...